These instructions show you how to simply pan-sharpen Landsat 8 imagery using ArcGIS 10. The imagery is available for free from the USGS.
នេះជាសេចក្ដីណែនាំ បង្ហាញអ្នកអំពីរបៀប នៃការធ្វើ pan-sharpen លើ Landsat 8 ដោយប្រើប្រាស់ កម្មវិធី ArcGIS 10 ។ រូបភាពទាំងនេះមាននៅក្នុង USGS ដោយមិនគិតថ្លៃ។
1. After you have downloaded the imagery, add bands 4,3 and 2 to ArcMap. These bands represent visible Red, Green and Blue and cover a similar wavelength range as the panchromatic band.
បន្ទាប់ពីអ្នកបានទាញយក imagery បានបន្ថែម 4,3 Band និងទី 2 ដើម្បី ArcMap ។ នៅក្នុង bands ទាំងនេះតំណាងអោយ band ដែលអាចមើលឃើញ Red, Green និង Blue ហើយមានដែលមាន ប្រវែងរលកប្រហាកប្រហែលគ្នា ក្នុងការធ្វើ panchromatic នេះ។
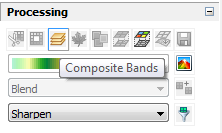
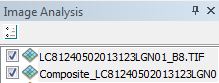
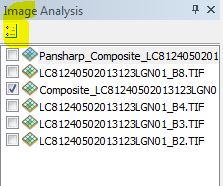
2. If not already visible, show the image analysis window (Windows -> Image Analysis). Now select the three images and click the “Composite Bands” button.
ប្រសិនបើមើលមិនឃើញមានដូចការបង្ហាញ image នៅក្នុង analysis window នោះត្រូវចូលទៅក្នុង (Windows -> Image Analysis)។ ឥឡូវត្រូវ select លើ images ទាំងបី ហើយចុចពាក្យ “Composite Bands” button។
3. This produces a new temporary image with three bands.
នេះជាផលិតផលជាបណ្ណោះអាសន្ន បន្ទាប់ពី bands ទាំងបីរួមបញ្ចូលគ្នា។
4. Now, add Band 8 to ArcMap. In the Image Analysis window, select Band8 and the composite images and click the “Pan-sharpening” button.
ឥឡូវនេះ add Band 8 ទៅក្នុងកម្មវិធី ArcMap។ នៅក្នុង Image Analysis window ជ្រើសរើសយក Band 8 ហើយនិង composite images បន្ទាប់មកចុចលើ “Pan-sharpening” button ។
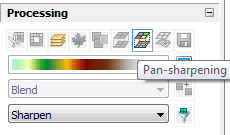
5. The resulting image should be a color, pan sharpened image. To adjust the contrast, choose the options as shown below.
លិទ្ធផល image គឺពណ៌ធម្មជាតិ pan sharpened image ធ្វើអោយតម្រូវកម្រិតពណ៌ ដែលមានក្នុងការជ្រើសរើស ដូចមានបង្ហាញខាងក្រោមនេះ។
6. Before and after images are shown below at scale 1:25,000
ពីមុន និងបន្ទាប់មក images បានបង្ហាញដូចខាងក្រោមក្នុងមាត្រដ្ឋាន 1:25,000
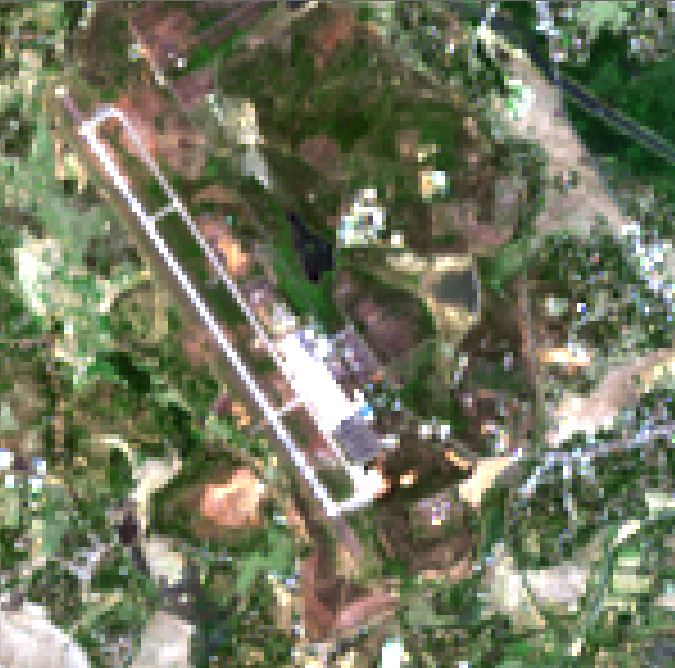
Before Pan-sharpening
រូបភាពមុនពេលធ្វើ Pan-sharpening
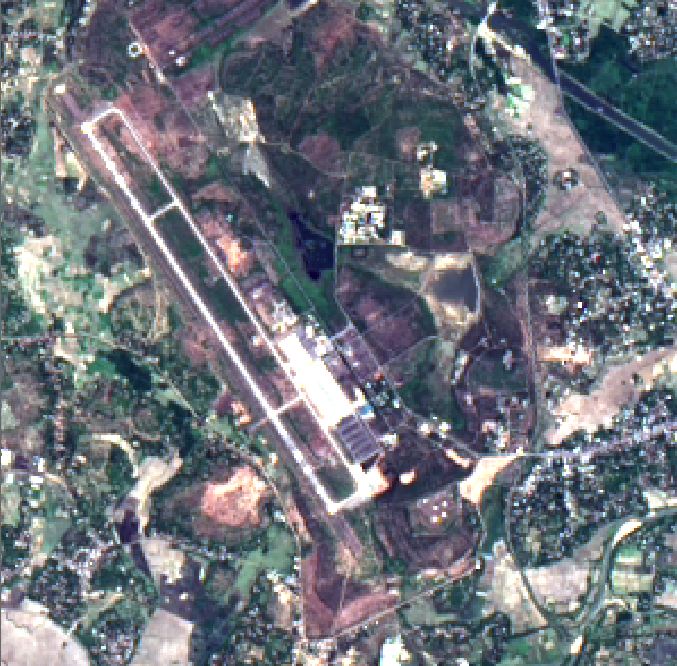
After Pan-sharpening
រូបភាពបន្ទាប់ពីធ្វើ Pan-sharpening រួច
7. To save your pan-shapening image permanently to a new file, click the “Export” button in the Image Analysis window and then “Save” button.
ត្រូវ Save រូបភាពរបស់អ្នក បន្ទាប់ពីធ្វើ pan-shapening រួចអោយទៅជា file មួយថ្មីដែលអាចប្រើប្រាស់ជារហូត ដោយចុចលើពាក្យ Export ដែលមាននៅក្នុង Analysis window។ បន្ទាប់មកចុចពាក្យ “Save” button។
8. Advanced Tip: To change the pan sharpening method, click the Options button in the image analysis window. The default is ESRI, but the Brovey transform also yeilds good results.
ព័ត៌មានបន្ថែម: ក្នុងការផ្លាស់ប្តូរ ជំរើសក្នុងការជ្រើសរើសដើម្បី pan sharpening ត្រូវចុច Options ដែលមាននៅក្នុង analysis window។ ដូចដែលមានលំនាំដើម ESRI ប៉ុន្តែការផ្លាស់ប្តូរមកយក Brovey ក្នុងការប្រើប្រាស់វាជាលិទ្ធផលមួយដែលល្អ។
Dear Sir,
I just bought Garmin Rino 610, Can you Setup cambodia map ? and how much is it?
Hi there,
Yes, we can install a Cambodia Map. Please come to our shop at 417 Sisowath Blvd.
Thanks, Aruna.